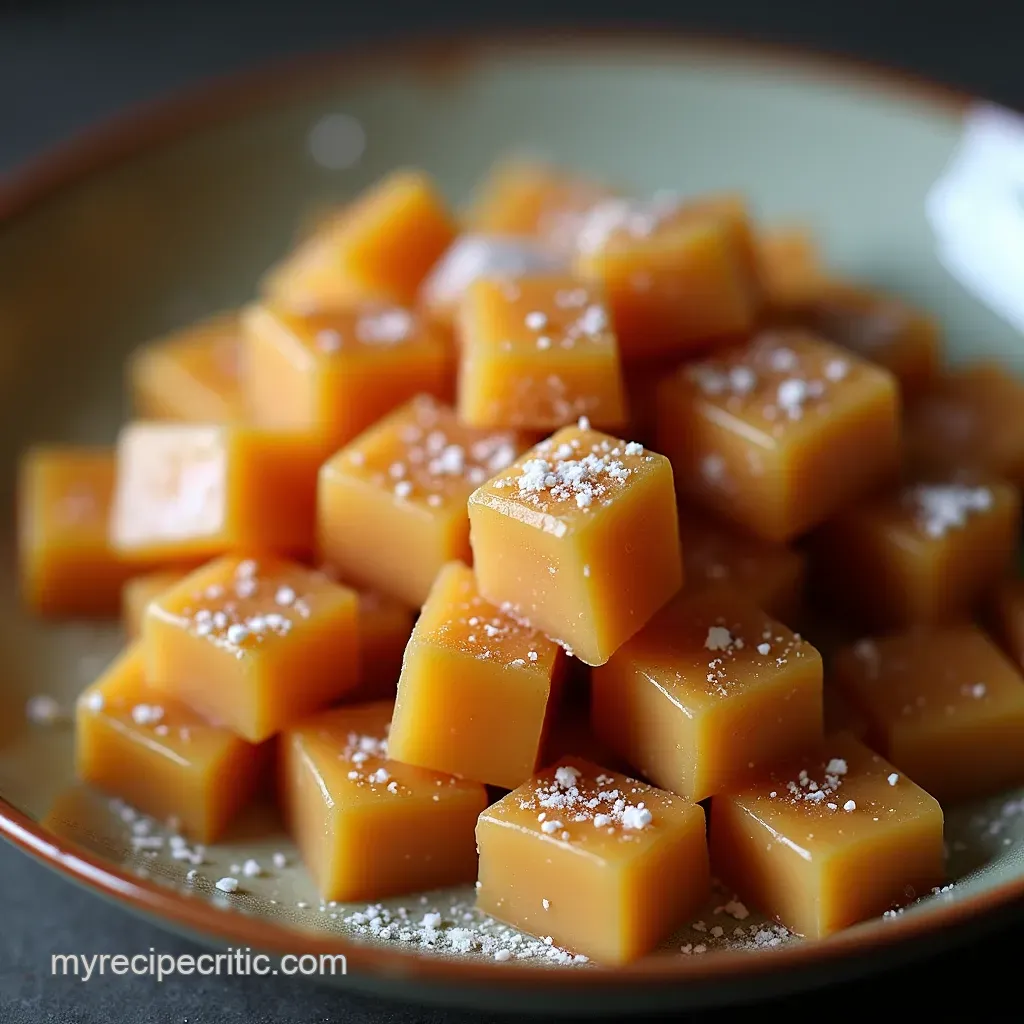
There's something truly magical about homemade toffee. The moment that rich, buttery aroma fills your kitchen, you know you're creating a treat that transcends mere candy. It's a symphony of textures and flavors: a delightfully crunchy snap followed by the melt-in-your-mouth richness of butter and chocolate, often finished with a tantalizing sprinkle of sea salt and nuts. While store-bought versions exist, nothing compares to the exquisite taste and personal touch of a batch made from scratch. And contrary to popular belief, mastering this classic confection, especially its signature hard crack texture, is more approachable than you might think.
This comprehensive guide will demystify the art of making the perfect homemade toffee, revealing the secrets behind its crisp texture and offering creative ways to turn your culinary creation into a cherished gift. Get ready to embark on a journey that culminates in the ultimate buttery, chocolate-covered delight, ideal for holiday goodie bags or simply satisfying your own sweet cravings. If you're looking for an even quicker take on this festive treat, explore our Easy Homemade Toffee: Your Go-To Holiday Candy Recipe.
The Irresistible Allure of Homemade Toffee
What makes toffee such a beloved classic? It's more than just a simple combination of butter and sugar; it's a meticulously crafted candy with a distinct personality. Unlike its softer cousins, caramel or butterscotch, which might cook to a chewy "soft crack" stage, true toffee is defined by its characteristic hard crack. This means it shatters with a satisfying crispness, a testament to its precise preparation. Imagine biting into a piece: first, the firm, crisp break, then the immediate release of rich, caramelized butter flavor, followed by the luxurious embrace of melted chocolate and the delightful crunch of toasted almonds.
Beyond its inherent deliciousness, homemade toffee offers incredible versatility. While delectable on its own, it truly shines when adorned with a cloak of melted chocolate – whether you prefer the creamy sweetness of milk chocolate, the sophisticated bitterness of dark, or the balanced profile of semi-sweet chips. A sprinkle of crunchy nuts, like toasted almonds, adds another layer of texture, while a touch of flaky sea salt elevates the flavor profile, balancing the sweetness with a savory counterpoint. For those seeking an unexpected twist, a hint of dark rum or whiskey can infuse your toffee with a warm, complex note that will surprise and delight.
Unlocking the "Hard Crack" Secret: Your Candy Thermometer is Key!
The quest for perfectly crunchy toffee hinges on one critical tool and one precise temperature: the candy thermometer and 300°F (149°C), which signifies the hard crack stage. This is where many aspiring candy makers falter, either by guessing the temperature or being intimidated by the process. But fear not! With a reliable candy thermometer, this step becomes straightforward and ensures your toffee achieves its signature crispness.
So, why is 300°F so important? As the sugar and butter mixture cooks, water evaporates, and the sugar concentration increases. At the hard crack stage, virtually all the water has boiled away, resulting in a very high sugar concentration. When cooled, this creates a solid, brittle, and glass-like texture that shatters beautifully. If you pull the mixture off the heat too early (e.g., at soft crack or firm ball stage), your toffee will be chewy and sticky, resembling a caramel. Cook it too long, and you risk burning the sugars, leading to a bitter, unpleasant taste.
Tips for Candy Thermometer Success:
- Placement is everything: Ensure the tip of your thermometer is submerged in the candy mixture but not touching the bottom of the pot. Contact with the hot bottom can give a false, higher reading.
- Calibrate (optional but recommended): Periodically check your thermometer's accuracy by placing it in a pot of boiling water. It should read 212°F (100°C) at sea level. Adjust your target temperature accordingly if it's off.
- Stay focused: The temperature can rise rapidly in the final stages. Keep a close eye on your thermometer as it approaches 300°F.
Once you understand and respect the role of the candy thermometer, you'll find that making toffee is far less intimidating than it seems, paving the way for consistent, delicious results every time.
Essential Ingredients & Pre-Prep for Perfect Toffee
While the process of making toffee can seem a little daunting, the ingredient list is surprisingly simple. However, the quality and preparation of these few components are paramount. Think of it as a culinary "mise en place" – getting everything ready before you start cooking is half the battle!
Key Ingredients:
- Unsalted Butter: This is the heart of your toffee, providing its rich, creamy flavor. Unsalted is preferred as it gives you control over the salt content, but in a pinch, you can use salted butter and omit any added sea salt.
- Sugars & Corn Syrup: A combination of granulated sugar, light brown sugar, and light corn syrup forms the sweet, crunchy base. The corn syrup isn't just for sweetness; it plays a crucial role in preventing sugar crystallization, ensuring a smooth, glassy texture rather than grainy toffee. There's no good substitute for the corn syrup in this context.
- Water: Just a tablespoon is needed to help dissolve the sugars initially.
- Baking Soda: A small amount of fresh baking soda is added at the very end. It reacts with the hot sugar mixture, creating tiny air bubbles that make the toffee slightly more tender and easier to bite through, preventing it from being too hard or brittle. Make sure your baking soda is fresh, not baking powder.
- Flavor Enhancers:
- Rum (or Whiskey/Bourbon): A splash of dark rum or a similar spirit adds an unexpected depth and warmth. If you prefer not to use alcohol, 3 tablespoons of vanilla extract is a fantastic alternative.
- Almonds: Toasted almonds offer a delightful crunch and nutty flavor. They can be mixed into the toffee and sprinkled on top of the chocolate coating. Toasting them beforehand is crucial for maximizing their flavor.
- Chocolate Chips: Milk, dark, or semi-sweet chocolate chips (or a combination) will melt beautifully to form the top layer.
- Flaky Sea Salt: A sprinkle of Maldon or similar flaky sea salt on top of the wet chocolate provides a sophisticated salty-sweet contrast that truly elevates the toffee. This is optional but highly recommended.
Crucial Pre-Preparation Steps:
- Gather Your Tools: Have your large rimmed baking sheet ready. Lightly oil it with vegetable or canola oil – this step is non-negotiable to prevent sticking! Do the same for your spatula.
- Measure Everything: Precisely measure all your ingredients and have them ready at hand. Candy making moves quickly once the cooking starts, and you won't have time to measure ingredients then.
- Toast the Nuts: Spread your almonds on a baking sheet and toast them in a preheated oven until golden brown and fragrant. Let them cool briefly before chopping them. This simple step vastly improves their flavor.
- Candy Thermometer Ready: Ensure your candy thermometer is clean, in working order, and easily accessible.
With your ingredients prepped and tools at the ready, you've set yourself up for success in creating truly exceptional toffee.
Crafting Your Masterpiece: Step-by-Step Toffee Recipe
Now that you're prepped, let's dive into the exciting part: cooking the toffee! Remember, precision and attention are your best friends here.
The Cooking Process:
- Combine & Melt: In a heavy-bottomed saucepan (this helps prevent scorching), combine your unsalted butter, granulated sugar, light brown sugar, light corn syrup, and water. Cook over medium heat, stirring constantly, until the butter has completely melted and the sugars have dissolved. This ensures a smooth base for your toffee.
- Bring to a Boil: Once melted, increase the heat to medium-high. Insert your candy thermometer, making sure it's not touching the bottom of the pan. From this point, resist the urge to stir until the mixture is very hot, almost reaching your target temperature. Stirring can introduce sugar crystals, leading to grainy toffee. Simply let it boil, monitoring the temperature carefully.
- Reach Hard Crack: Continue cooking until the mixture registers precisely 300°F (149°C) on your candy thermometer. As it approaches this temperature, the color will deepen to a rich, amber hue.
- Stir in Baking Soda & Nuts: Immediately remove the saucepan from the heat. Quickly stir in the fresh baking soda and about half of your toasted, chopped almonds. The mixture will foam up slightly – this is normal and desirable, as the baking soda helps to aerate the toffee.
- Pour & Spread: Working quickly, pour the hot toffee mixture onto your prepared (lightly oiled) large rimmed baking sheet. Use your oiled spatula to spread it evenly into a thin layer. The faster you do this, the more even your toffee will be before it starts to set.
- Cool Slightly: Allow the toffee to cool on the baking sheet for about 5-10 minutes, just until it's slightly firm but still warm to the touch.
The Finishing Touch: Chocolate & Toppings
- Melt the Chocolate: While the toffee cools slightly, gently melt your chocolate chips. You can do this in a microwave (in 30-second intervals, stirring between each) or over a double boiler. Stir until smooth and glossy.
- Spread Chocolate: Pour the melted chocolate evenly over the slightly cooled toffee, spreading it edge to edge with your spatula.
- Top & Chill: Immediately sprinkle the remaining toasted, chopped almonds and the flaky sea salt over the wet chocolate. Gently press them down if needed. Place the baking sheet in the refrigerator for about 30-60 minutes, or until the chocolate is completely set and firm.
- Break & Enjoy: Once fully chilled, your masterpiece is ready! Use your hands to break the hardened toffee into irregular pieces. The satisfying snap will be your reward for a job well done.
For more delicious variations on this classic, check out our guide to Buttery Crunch: The Ultimate Chocolate Covered Toffee Recipe.
Beyond the Kitchen: Elegant Toffee Gift Ideas
Homemade toffee isn't just a treat; it's an experience, making it an exquisite gift for any occasion, especially during the holidays. Few things say "I care" quite like a beautifully packaged, handcrafted confection. The care and effort you put into making it will shine through, creating a memorable present.
Presentation Matters:
- Festive Tins: Package your broken toffee pieces in decorative tins. Line the tins with parchment paper or festive cupcake liners for an extra touch.
- Clear Bags & Ribbons: Cellophane bags tied with elegant ribbons (think satin or grosgrain) allow the beauty of the chocolate-covered toffee to be seen.
- Goodie Bags & Boxes: For a grander gesture, combine your homemade toffee with other delightful treats like chocolate bark, fudge, or spiced nuts in a larger goodie bag or decorative box. This creates a curated selection of homemade goodness.
- Personalized Tags: Add a small, handwritten tag with a simple "Happy Holidays" or "Made with Love" to personalize your gift.
Storage for Freshness:
To ensure your gifted toffee remains as delicious as the day it was made, advise recipients (or yourself!) to store it properly. Homemade toffee keeps wonderfully at room temperature for up to two weeks, as long as it's kept in an airtight container. This prevents it from absorbing moisture, which can make it sticky, and keeps it beautifully crisp.
Whether it's a hostess gift, a thank-you present, or a sweet contribution to a holiday gathering, your homemade toffee will undoubtedly be a standout. Its universal appeal and delicious simplicity make it a gift that everyone will appreciate.
Mastering the art of classic toffee, with its satisfying hard crack and rich, buttery flavor, is a truly rewarding culinary endeavor. By understanding the critical role of the candy thermometer, carefully preparing your ingredients, and following these steps, you can confidently create a confection that will impress and delight. From the crack of the first bite to the last lingering taste of chocolate and toasted nuts, homemade toffee is a testament to the joy of making something truly special. So, grab your apron, preheat your pan, and prepare to fill your home with the intoxicating aroma of this timeless treat – your taste buds, and your friends and family, will thank you!
